
Bathroom & Kitchen Waterproofing in Makkah — Pre-Tiling & Renovation Wet-Zone Protection
Across Makkah’s multi-story buildings and villas, we install flexible polymer-modified cementitious and liquid membranes beneath bathroom and kitchen tiles to prevent ceiling seepage to lower floors and dampness on adjacent bedroom walls.
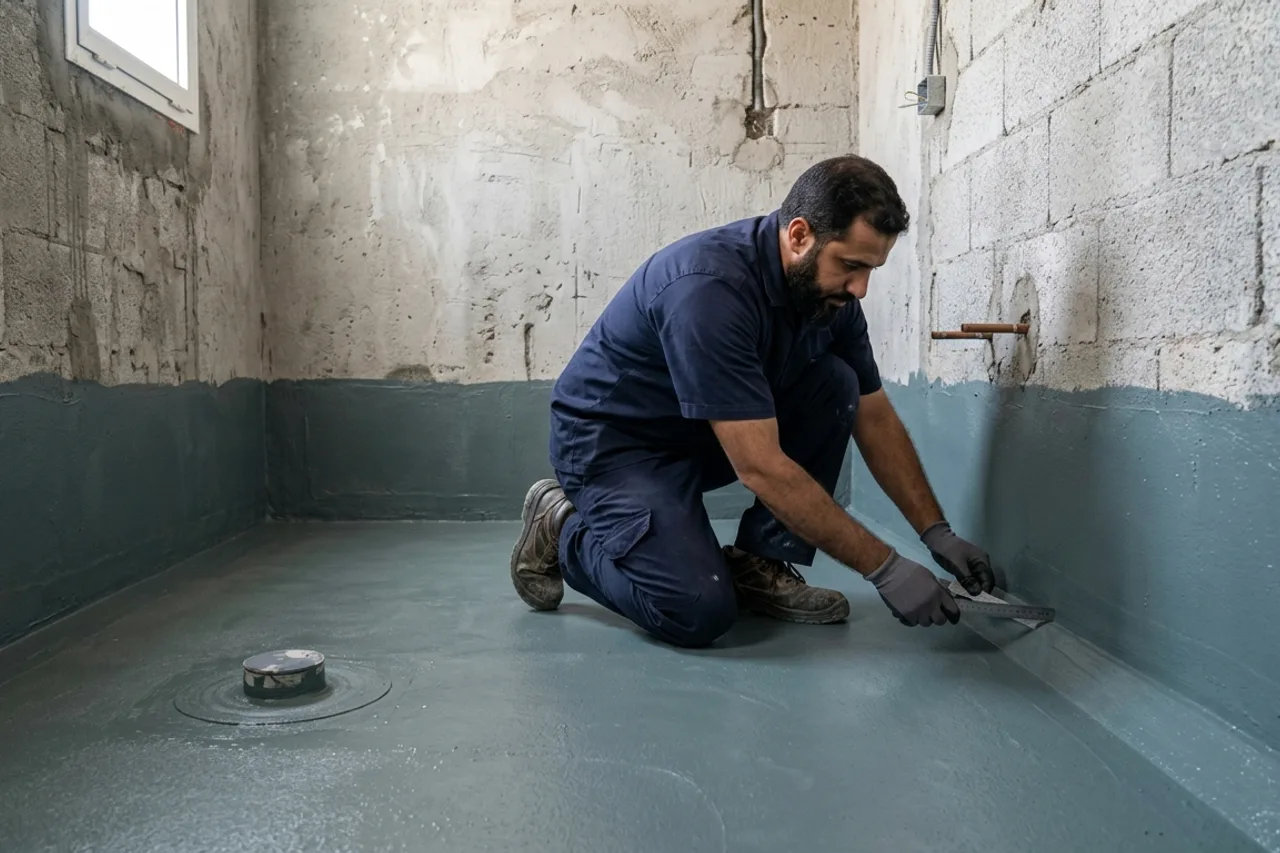
Why Water Leaks From Bathrooms & Kitchens Despite Ceramic or Porcelain Tiles
A common misconception is that ceramic or porcelain tiles alone make a bathroom or kitchen waterproof. In reality, tile grout lines, drain perimeters, and mixer escutcheons inevitably allow water to percolate down into the mortar and sand-screed bed beneath the tiles.
Without a continuous, tanked waterproofing membrane forming a watertight basin beneath the tiling, trapped water saturates the sub-tile fill, wicks horizontally into adjacent bedroom and hallway walls (causing peeling paint and efflorescence), and seeps vertically through the ceiling slab of the floor below.
Peeling Paint & White Efflorescence on Bedroom/Hallway Walls Adjacent to Wet Areas
Technical Mechanism: Omitting wall waterproofing upturns and threshold dams allows sub-tile moisture to migrate laterally by capillary action into neighboring masonry walls.
Ceiling Dripping & Staining on the Floor Directly Below a Bathroom or Kitchen
Technical Mechanism: Missing or failed waterproofing around the floor drain sleeve, walk-in shower floor, or vertical soil-stack slab penetrations.
Hidden Moisture Accumulation Behind Kitchen Cabinets & Under Dishwashers/Sinks
Technical Mechanism: Leaving kitchen wet zones, floor drains, and appliance bays unwaterproofed prior to cabinetry installation allows water spills to saturate the floor slab.
Securing Water Tanks, Pools & Wet Zones in Makkah
Illustrative engineering diagram only — actual layer sequence and specification are determined following on-site substrate inspection per manufacturer TDS.
Technical Definition & Scope of Bathroom & Kitchen Wet-Area Waterproofing
This engineering service covers both **Bathroom Waterproofing** and **Kitchen / Laundry Wet-Area Waterproofing**, uniting internal wet-zone membrane design under one rigorous standard tailored to new construction and renovation.
Our methodology transforms the bathroom or kitchen floor into a monolithic watertight basin using polymer-modified flexible cementitious slurries or liquid membranes compatible with tile adhesives, complete with wall upturns, shower-zone tanking, drain collars, and door threshold dams.
What Is Included in Bashaer Al Khair’s Execution Scope:
- Cleaning and preparing the concrete slab/screed, and installing mortar fillets or elastomeric reinforcing tape along all wall-to-floor junctions.
- Sealing around floor drain bodies, soil-stack penetrations, and pipe outlets with waterproof collars and elastomeric mastic.
- Applying multi-coat waterproofing across the entire floor, turning up 20–30 cm on standard walls and full height (180–200 cm) inside walk-in shower enclosures.
- In kitchens and laundry rooms: waterproofing the floor slab, under-sink and dishwasher/washing-machine bays, floor drain perimeters, and lower wall upturns behind cabinetry.
Engineering Scope Boundaries & Transparency
- Waterproofing Does Not Replace Pipe Repair: If an existing bathroom or kitchen has a burst pressurized supply pipe or broken drain fitting, plumbing repair must come first.
- Post-Tiling Grout Sealing Limits: Surface grout sealing on existing tiles works only when seepage is limited to deteriorated tile joints; if the sub-tile bed is flooded or the primary slab membrane has failed, tile removal and re-tanking may be required.
Two-Component Polymer-Modified Flexible Cementitious Slurry, Under-Tile Liquid Polyurethane, Corner Reinforcing Tapes & Drain Collars
Critical Wet Zones Covered in Bathrooms & Kitchens
We map and waterproof every moisture-exposed zone inside residential and commercial wet areas:
New or Remodeled Bathrooms Prior to Tiling
Substrate Type: Structural concrete slab or sloped cementitious screed bed.
Walk-In Shower Floors, Curbs & Shower Walls
Substrate Type: Sloped shower pan, linear/square drain channel, and surrounding plastered walls.
Kitchen Floors, Under-Sink Bays, Dishwashers & Laundry Rooms
Substrate Type: Kitchen and laundry concrete floor slabs and drainage zones.
Pre-Waterproofing Assessment for Bathrooms & Kitchens
Before selecting the waterproofing system, our engineer evaluates three essential site conditions:
1. Pre-Tiling Construction Stage vs. Existing Tiled Room
Pre-tiling allows full sub-tile membrane tanking; in an existing tiled bathroom, we must first diagnose whether the leak is in supply pipes, drains, or grout.
2. Verifying Drain Pipe Stability & Supply Line Pressure Testing
All plumbing rough-in, pressure testing, and pipe haunching must be completed prior to waterproofing so plumbers do not chisel through the new membrane afterward.
3. Door Threshold Dam & Floor Level Check
Without a waterproofed threshold dam at the bathroom or kitchen doorway, sub-tile moisture migrates directly under hallway flooring and door frames.
Material Systems Used in Bathroom & Wet-Area Waterproofing
We match the waterproofing membrane chemistry to the subsequent tiling method (sand-cement bed vs. direct thin-set tile adhesive):
Two-Component Polymer-Modified Flexible Cementitious Membrane
Best Suited For: Bathroom floors, shower walls, and kitchens where porcelain or ceramic tiles will be bonded directly using flexible cementitious tile adhesive.
Under-Tile Liquid Polyurethane Membrane with Quartz Sand Broadcast
Best Suited For: Upper-floor bathrooms and wet rooms requiring high crack-bridging elasticity.
Traditional Sheet / Bituminous Tanking (Beneath Screed Beds)
Best Suited For: Primary slab waterproofing beneath traditional thick-bed tiling, protected immediately with a mortar screed layer before plumbing installation.
Step-by-Step Engineering Workflow for Wet-Area Waterproofing
Phase 1: Substrate Cleaning, Pipe Haunching & Corner Fillet Prep
Removing gypsum droppings and laitance, sealing around drain pipes with non-shrink mortar, and preparing wall-to-floor corners.
Phase 2: Embedding Corner Reinforcing Tapes & Drain/Pipe Collars
Embedding elastomeric waterproof tape along all floor-to-wall joints and door thresholds, plus flexible collars around drains and mixer outlets.
Phase 3: Applying Cross-Directional Waterproofing Coats
Applying two perpendicular coats across the floor, perimeter wall upturns, and full shower walls to form a seamless pinhole-free membrane.
Phase 4: Curing, Water Retention Check & Protection During Tiling
Allowing full cure, verifying watertightness, and instructing tiling crews to use compatible flexible adhesive without puncturing the membrane.
Critical Detailing Points in Bathroom & Kitchen Waterproofing
Most bathroom and kitchen leaks trace back to one of four detailing errors that our protocol eliminates:
1. Removing Gypsum Plaster Droppings Prior to Cementitious Waterproofing
Failure Risk:Gypsum droppings left on the floor slab prevent cementitious waterproofing from bonding to concrete and cause sulfatic debonding.
2. Waterproofing Connection to the Floor Drain Body
Failure Risk:Standard mortar does not bond to smooth PVC drain pipes, leaving a hairline gap around the drain where water leaks to the floor below.
3. Walk-In Shower Walls, Recessed Niches & Concealed Mixers
Failure Risk:Waterproofing only the floor while leaving shower walls and recessed shampoo niches bare allows water to penetrate behind wall tiles.
Distinguishing Membrane Failure, Pipe Leaks, Drain Faults & Condensation
We never market waterproofing as a cure-all for every bathroom leak; we distinguish four separate mechanisms:
When to Request Bathroom/Kitchen Waterproofing vs. Leak Detection
If your bathroom or kitchen is already tiled and leaking, use this decision guide or visit our Bathroom/Kitchen Leak Detection pages:
New bathroom/kitchen under construction or undergoing full tile renovation
Correct Engineering Action: Request Bathroom & Wet-Area Waterproofing to install flexible cementitious membranes and corner tapes prior to tiling.
Existing tiled bathroom leaking onto the ceiling below with unknown cause
Correct Engineering Action: Start with Bathroom Leak Detection to test supply pressure, drains, and grout before any demolition.
Why Bathroom Waterproofing Makkah Requires Local Makkah Engineering Expertise
In Makkah, multi-story residential and hospitality buildings contain vertically stacked bathrooms and kitchens under heavy occupancy; a single waterproofing defect on an upper floor can damage multiple floors below.
Makkah experiences intense thermal radiation amplified by surrounding rocky mountain basins, combined with seasonal torrential downpours that rapidly load flat roofs and channel runoff along rock fissures toward foundations and underground cisterns. Furthermore, multi-story residential and hospitality buildings in Makkah feature dense rooftop mechanical installations creating critical penetration zones.
Key Building Envelope Challenges We Solve in Makkah:
- High daily water usage in Makkah bathrooms and ablution areas makes floor-drain collar detailing and door threshold dams critical.
Common Local Application Scenarios in Makkah:
Installing complete floor and wall-upturn waterproofing membranes across villas and residential buildings.
Applying heavy-duty flexible cementitious membranes to prevent inter-floor water seepage.
Factors Determining Bathroom & Kitchen Waterproofing Cost
Quotations for bathroom and kitchen waterproofing are based on unit count and technical scope:
1. Number of Bathrooms / Kitchens & Floor Area
Waterproofing multiple bathrooms and kitchens in a villa or apartment building optimizes mobilization compared to a single small wet room.
2. Wall Upturn Height & Full-Height Shower Enclosure Area
Floor tanking with a 30 cm perimeter upturn uses less material than full-height waterproofing across walk-in shower walls.
3. Membrane System, Corner Reinforcing Tapes & Drain Collars
Specifying high-elongation two-component slurries with elastomeric corner tapes and pipe collars ensures durability beneath porcelain.
Pre-Waterproofing Checklist for Bathrooms & Kitchens
- For new builds or remodels: complete and pressure-test all rough-in plumbing and anchor floor drain bodies in mortar.
- Finish overhead ceiling plaster/gypsum work first and scrape all gypsum droppings off the floor slab.
- For existing tiled bathrooms receiving joint sealing: keep the bathroom dry for 24 hours prior to scheduled work.
Quality Verification Before Handover to Tiling Crews
We verify the integrity of the waterproofed wet-area basin before tiling commences:
Inspecting every corner, pipe sleeve, floor drain, and door threshold to confirm continuous pinhole-free membrane build-up.
Once the membrane is fully cured, plugging the drain outlet and flooding the bathroom floor verifies zero seepage to the ceiling below prior to laying tiles.
Saudi Building Code — Energy Conservation for Low-Rise Residential Buildings (SBC 602)
Defines maximum allowable thermal transmittance (U-value) for roofs and exterior walls in low-rise residential villas based on climatic zone (Jeddah and Makkah fall within hot climate zones requiring robust roof thermal resistance).
Saudi Building Code — Energy Conservation for Non-Residential Buildings (SBC 601)
Governs building envelope thermal performance for commercial, administrative, hospitality, and multi-story buildings, emphasizing continuous insulation and thermal bridge mitigation.
Saudi Building Code — Soils and Foundations: Damp-Proofing & Waterproofing (SBC 303)
Distinguishes between subsurface Damp-Proofing (where no hydrostatic head exists) and full Waterproofing (required where groundwater tables, hydrostatic pressure, or aggressive sulfate/chloride soils are present, such as coastal Jeddah).
Manufacturer Technical Data Sheets (TDS), Safety Data Sheets (SDS) & Potable Contact Certifications
Manufacturer TDS documents govern maximum allowable substrate moisture, primer pairing, consumption rate per m², recoat intervals, and full curing times prior to water immersion.
Before proposing waterproofing on roofs, bathrooms, tanks, or pools, we verify whether moisture stems from pressurized pipes, drains, or float valves (routing to leak detection first if needed).
We evaluate substrate type (concrete, tile, metal), screed soundness, cracks, honeycombing, hollow tiles, and whether existing insulation can be restored or requires removal.
We map ponding zones, slope gradients toward rainwater scuppers/drains, and subsurface moisture levels beneath tiles or within concrete to prevent post-application blistering.
We determine whether the asset requires waterproofing, thermal insulation, or a combined system, selecting materials matched to foot traffic, UV exposure, or continuous water immersion.
We specify detailing protocols for parapet wall coving/upstands, structural expansion joints, HVAC/tank plinths, floor drains, and pipe sleeves.
We provide a clear scope covering surface preparation, proposed system layers, and topcoat/protection requirements so the client understands the exact quotation basis.
Build Your Project Scope & Request an Itemized Quote in Makkah
We never quote misleading flat rates without evaluating your substrate. Select your project parameters below to generate your technical scope summary and schedule an engineer visit.
Select Your Property Parameters for an Instant Engineering Recommendation
Complete Roof Waterproofing (Concrete & Tiled Roofs)
Proposed Engineering Assembly: Reinforced Liquid Polyurethane Membranes or Bituminous Assemblies Matched to Deck State
Delivers complete roof rainwater protection with full slope, parapet coving, and drain collar detailing.
Material & System Comparison: Where Each System Excels & Its Technical Limits
Filter by building zone to compare each system across water exposure, solar UV resistance, foot traffic, protective layers, and substrate constraints:
Modified Bituminous Membranes (APP / SBS Rolls)
Concrete roofs prior to tiling, buried foundations, retaining walls, and exposed non-traffic roofs (when using mineral slate-surfaced APP rolls).
Substrates: Smooth reinforced concrete slabs and cured slope-screed beds primed with compatible bituminous primer.
High resistance to rainwater ponding and subsurface dampness when side (10 cm) and end (15 cm) lap seams are fully fused.
Smooth rolls require UV cover; mineral-slate-surfaced APP membranes resist direct solar radiation on non-trafficked roofs.
Low when exposed — requires geotextile separation felt and protective screed/tiling for regular foot traffic.
Yes on trafficked roofs and buried foundations (protection boards or non-woven geotextile felt beneath screed/backfill).
Not suitable for internal potable water tanks or swimming pools; seam integrity depends heavily on skilled lap detailing.
Polymer-Modified Flexible Cementitious Waterproofing
Bathrooms and wet zones prior to tiling, concrete water tanks, swimming pool shells under mosaic tiles, and foundations.
Substrates: Sound reinforced concrete, cementitious renders, and plastered masonry brought to a saturated-surface-dry (SSD) state.
Engineered for continuous water immersion (tanks and pools) and both positive and selected negative hydrostatic pressure.
Moderate to low under prolonged direct desert sun — designed to be covered by ceramic/mosaic tiles or protective coatings.
Tolerates light installation traffic once cured, but requires protective tiling or screed for permanent foot traffic.
Yes on floors and decks (ceramic/porcelain tiling with compatible C2TE/S1 flexible adhesive or protective screed).
Lower crack-bridging elongation than pure polyurethane membranes; not intended as an exposed roof coating over wide thermal joints.
Liquid-Applied Acrylic & Hybrid Elastomeric Membranes
Sloped exposed roofs without heavy ponding, UV-protective topcoat over spray polyurethane foam, and parapet/roof restoration.
Substrates: Concrete, cementitious screed, closed-cell spray polyurethane foam (SPF), and properly abraded/primed tiled surfaces.
Effective against shedding rainwater; pure acrylics are not recommended for permanent ponding water unless PU-hybridized.
Excellent — highly resistant to UV degradation and maintains elasticity and solar-reflective white/light finish.
Suitable for light maintenance foot traffic; requires full fleece reinforcement or pedestrian-grade PU topcoat for regular traffic.
No UV cover required as the membrane itself is formulated for direct solar exposure.
Unsuitable for submerged tanks or pools, and cannot compensate for severe negative roof slopes causing deep standing water.
High-Elastomeric Liquid Polyurethane Waterproofing Systems
Concrete and tiled roofs subject to ponding water, balconies, terraces, and complex rooftop mechanical zones.
Substrates: Dry concrete (<4–5% moisture content), and existing ceramic/porcelain tiles after mechanical grinding and specialized epoxy/PU primer.
Superior resistance to standing/ponding rainwater with high crack-bridging elongation across thermal cycles.
Aromatic base coats require an Aliphatic polyurethane UV-stable topcoat when left exposed to direct sunlight.
Good to high durability when finished with a pedestrian-grade aliphatic polyurethane wear coat.
Requires an aliphatic UV topcoat if exposed, or silica-sand broadcast / geotextile layer if tiled over.
Will delaminate or blister if applied over existing tiles whose underlying sand bed is saturated with trapped water.
Rigid Thermal Insulation Boards (XPS / EPS / PIR)
Villa, residential, and commercial flat roofs (in inverted or conventional roof assemblies) to reduce conductive heat transfer.
Substrates: Installed over tested waterproofing membranes (in inverted roof systems with geotextile filter fabric) beneath ballast or tiles.
Extruded polystyrene (XPS) boards have low water absorption, but board joints are NOT waterproof—a separate waterproofing membrane is mandatory.
Degrades under direct UV and wind uplift — must always be covered by geotextile fabric and gravel ballast, tiles, or screed.
Supports foot traffic once covered by load-distributing screed or paving slabs matched to the board compressive strength.
Mandatory (non-woven geotextile filter layer + heavy ballast, paving tiles, or screed to prevent UV degradation and wind uplift).
Never stops water leaks on its own; strictly serves as the thermal resistance component of a multi-layer roof system.
Closed-Cell Spray Polyurethane Foam (SPF System)
Exposed concrete roofs, corrugated metal/warehouse roofs, and roofs with dense HVAC/piping penetrations requiring seamless encapsulation.
Substrates: Dry, clean concrete decks, primed/rust-free metal decks, and solid substrates free of moisture, oil, and loose dust.
Closed-cell SPF finished with a continuous elastomeric/acrylic topcoat provides reliable rainwater resistance when proper drainage slopes exist.
Raw polyurethane foam oxidizes and chalks rapidly under UV rays — a UV-resistant elastomeric topcoat is mandatory.
Moderate (handles careful maintenance traffic); sharp tools or dragging heavy mechanical equipment can puncture the topcoat.
Mandatory: UV-protective elastomeric acrylic/polyurethane coating, or geotextile separation felt beneath screed/tiles.
Open-cell foam is unsuitable for exterior roofs, and any neglected breach in the UV topcoat exposes the foam to solar degradation.
Specialized Water Tank & Pool Coatings (Epoxy & Hydraulic Mortars)
Internal lining of reinforced concrete water tanks (using certified potable-water systems) and swimming pool structural shells.
Substrates: Mechanically profiled reinforced concrete with all honeycombing, tie-rod holes, and active negative leaks sealed first.
Specifically engineered for 24/7 continuous water immersion and resistance to chlorides and treatment chemicals.
Internal tank epoxies are designed for enclosed tanks (low UV stability); outdoor pools use flexible cementitious membranes under tiles.
High abrasion resistance during periodic tank cleaning once the full manufacturer curing schedule is completed.
Potable tank epoxy serves as the final smooth lining; pool cementitious waterproofing is covered by mosaic tiles and chemical-resistant grout.
Never assume generic industrial epoxy is potable-water safe — requires verified potable-water compliance documentation and full cure time.
Important Engineering Note: This guide provides an engineering comparison of material families; final system specification, primer pairing, and layer build-up are determined after an on-site substrate and moisture assessment per manufacturer TDS.
Technical Answers on Bathroom Waterproofing Makkah
Should a bathroom be waterproofed before plumbing or after pipe installation right before tiling?
Best engineering practice in modern thin-set tiling is applying flexible cementitious waterproofing directly over the final sloped screed *after* plumbing rough-in is anchored and immediately *before* tiling—preventing water from saturating the screed bed and avoiding membrane damage by plumbers. In sunken slabs, a two-stage system (structural slab + top of screed) provides maximum security.
Why are Kitchen Waterproofing and Bathroom Waterproofing addressed together?
Because kitchens, laundry rooms, and bathrooms share identical internal concrete slab conditions and use the exact same under-tile flexible cementitious membranes, corner tapes, and drain collars. Uniting them provides a complete wet-zone engineering guide without repetitive filler pages.
Water is dripping from my bathroom ceiling onto the floor below—should I order bathroom waterproofing immediately?
If the bathroom is already tiled and in use, start with our non-destructive Bathroom Leak Detection service first; the drip may come from a pressurized supply pipe or concealed cistern (fixable locally without stripping the whole floor). If pipes are sound and membrane/grout failure is confirmed, we proceed with waterproofing remediation.
How high should the waterproofing membrane be applied up bathroom walls?
Waterproofing should turn up at least 20 to 30 cm above finished floor level along all standard bathroom and kitchen walls, and extend to full height (180–200 cm) on walls inside walk-in shower enclosures.
Related Waterproofing & Insulation Services in Makkah
View All Makkah Waterproofing ServicesWater Tank Waterproofing in Makkah — Securing Underground & Overhead Concrete Water Tanks
Swimming Pool Waterproofing in Makkah — Concrete Pool Shell Protection for Villas & Resorts
Roof Waterproofing in Makkah — Securing Villa & Building Roofs Against Rainwater & Thermal Stress
Waterproofing Repair & Restoration in Makkah — Maintaining & Renewing Existing Insulation Systems
Diagnostic & Engineering Comparison Guides to Help You Decide
Lower Wall Dampness & Peeling Paint Causes: How to Distinguish Plumbing Leaks from Rising Damp
Paint blistering or white crystalline salt deposits 15 to 60 cm above floor skirting boards are never a cosmetic issue solved by repainting—they are physical indicators of active moisture migration that must be traced at the source.
Water Leaking from the Bathroom Ceiling: How to Pinpoint the Exact Source Upstairs Without Random Demolition
When yellow stains or active water drops appear on your bathroom ceiling or gypsum soffit, the source lies in the wet area directly above—but is the culprit a pressurized supply pipe, a drainage elbow, eroded tile grout, or a breached slab membrane?
Sudden High Water Bill Causes in Jeddah & Makkah: Step-by-Step Meter, Float Valve & Underground Tank Diagnostic Guide
When your monthly water bill doubles or triples with no change in household occupancy and zero visible dampness indoors, water is almost certainly escaping silently underground or directly into a drain line—here is how to isolate the culprit step by step.
Swimming Pool Water Level Drop in Jeddah & Makkah: How to Scientifically Separate Evaporation from Plumbing & Shell Leaks
Every outdoor pool loses water to evaporation under the intense heat of Jeddah and Makkah—but when does daily water loss cross the engineering threshold into an active skimmer, light conduit, filtration pipe, or structural shell leak?