
In-Wall Pipe Leak Detection in Makkah — Precision Diagnostics for Concealed Wall & Shaft Piping
We locate leaks in vertical risers and horizontal wall branches inside Makkah apartments and villas, testing pressure stability under high booster-pump loads to isolate the exact fault point without stripping entire walls.
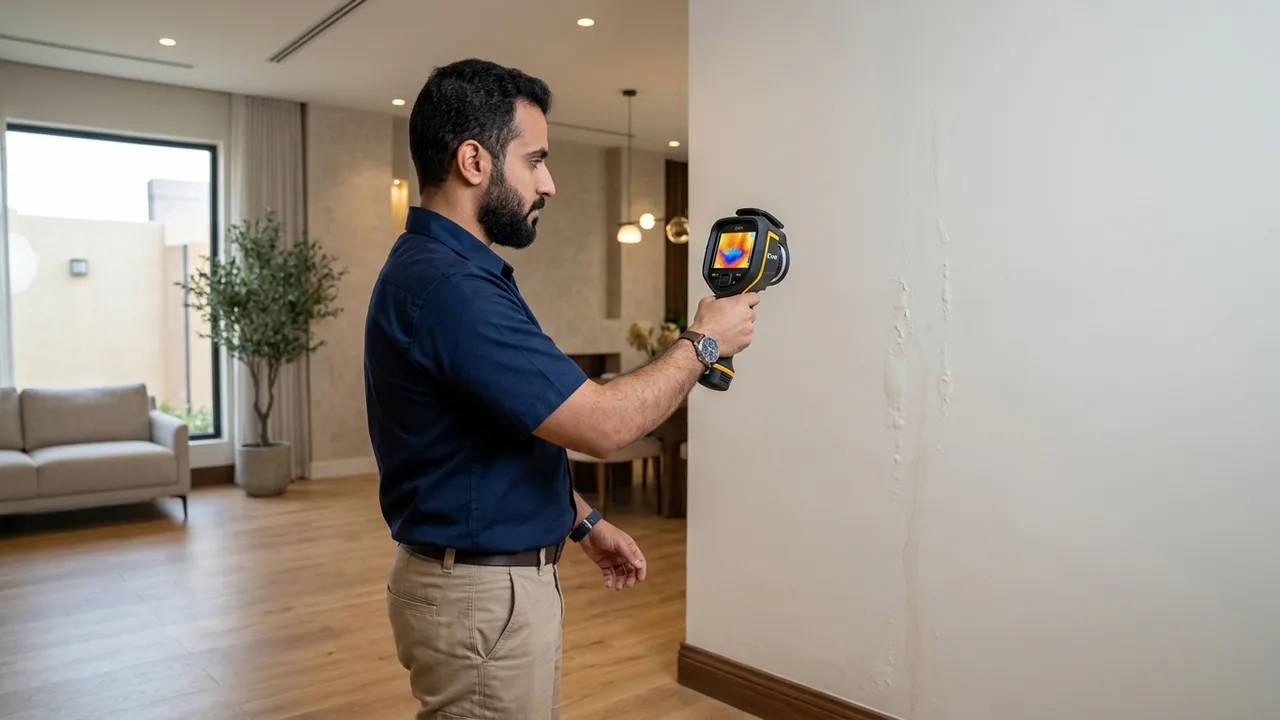
How Water Travels Inside Masonry Walls and Why Repainting Always Fails
Residential water supply pipes (PPR) and AC condensate drains are chased into hollow concrete blocks or clay bricks and plastered over with cement render, paint, or wall tiles. When a pinhole leak develops at an embedded elbow or coupling, porous masonry absorbs water radially while latex paint traps the moisture—causing blistering, efflorescence, and crumbling plaster.
Many property owners attempt cosmetic fixes by scraping and repainting with damp-proof primer or covering the wall with WPC/marble wall panels. Inevitably, trapped moisture spreads further, rotting concealed framing and spalling the render.
At Bashaer Al Khair, our diagnostic instruments read behind paint and wall tiles—mapping the concealed pipe route, testing its hydrostatic pressure, and pinpointing the exact leaking joint inside the wall.
Key Field Symptoms & Physical Indicators Requiring Inspection:
Paint blistering and plaster crumbling mid-wall or following a vertical/horizontal linear track
Physical Mechanism: Direct seepage from an embedded supply pipe or AC condensate line chased at that height inside the wall (unlike rising ground damp which stays near the floor).
Darkening wall-tile grout or wall tiles debonding and hollow-sounding in bathrooms/kitchens
Physical Mechanism: Water saturation of the cement render behind wall tiles from a leaking mixer adapter or vertical riser weakening tile adhesion.
Damp patches on the exterior building facade or plumbing shaft wall along vertical pipe runs
Physical Mechanism: Seepage from vertical down-feed supply lines from the roof tank or soil/waste stacks running through the shaft wall.
Hearing a faint hissing or dripping sound when standing close to an interior wall
Physical Mechanism: High-pressure water jetting from a defective PPR fusion weld or threaded brass union inside hollow block cavities.
Technical Root Causes of Concealed In-Wall Pipe Leaks
In-wall leaks arise from four distinct concealed systems that we differentiate during inspection:
1. Cracked Threaded Brass Adapters Behind Wall Mixers and Angle Valves
Over-tightening angle valves or mixer eccentric nipples during finishing creates hairline cracks in embedded brass/PPR female adapters inside the wall.
2. Accidental Drill Punctures from Mounting TVs, Curtains, Mirrors, or Cabinets
A very common occurrence where masonry drill bits nick a concealed PPR supply pipe or PVC AC drain line while mounting wall fixtures.
3. Blocked or Cracked Concealed Split-AC Condensate Drain Pipe
Concealed PVC condensate lines for split AC units frequently clog with biofilm or separate at unglued elbows inside the wall, saturating plaster throughout summer.
4. Vertical Soil Stack or Vent Pipe Seepage Inside Wall Corners and Shafts
Vertical 3–4 inch PVC soil stacks routed inside wall chases can leak at expansion sockets or cleanout plugs, creating vertical damp streaks.
When to Request In-Wall Pipe Leak Inspection & Safety Alerts
When Should You Schedule Inspection Immediately?
- As soon as paint bubbles, discolors, or flakes anywhere along an interior or exterior wall.
- Before installing wallpaper, WPC slats, marble panels, or built-in wardrobes on walls containing plumbing.
- When wall dampness appears specifically during summer beneath a wall-mounted split AC unit.
- Whenever a faint water sound is audible inside a wall with taps closed.
How Leaked Water Migrates Beneath Tiles & Inside Walls in Makkah Buildings
Illustrative engineering diagram only — exact leak coordinates and remediation scope are confirmed following on-site instrument inspection.
How We Execute In-Wall Pipe Leak Detection in Makkah Across 7 Structured Steps
Inquiry Intake & Initial Symptom Triage
We document the observed symptoms (bill spike, ceiling drip, peeling paint, or tank drop), property type in Jeddah or Makkah, and approximate plumbing age to prepare the right diagnostic kit.
Site Walkthrough & Safety Verification
The technician inspects visible dampness zones and checks that moisture has not compromised electrical panels, wall switches, or structural ceiling slab integrity.
Network Isolation, Meter & Pressure Testing
We isolate cold and hot supply branches and tank lines, monitoring pressure gauges and meter flow to determine whether the fault lies in a pressurized line or unpressurized drainage/grout.
Multi-Instrument Acoustic, Thermal & Moisture Mapping
We deploy the appropriate instruments (acoustic sensors for pressurized lines, thermal cameras for ΔT mapping, and dielectric moisture meters for saturation peaks) to narrow the fault to the smallest footprint.
Cross-Verification & Differential Diagnosis
We cross-check instrument readings to rule out non-pipe causes such as AC duct condensation, coastal capillary rising damp in Jeddah, or degraded shower tile grout.
Transparent On-Site Findings Briefing
We walk the client through the exact fault location, root cause, and whether remediation requires localized plumbing access (e.g., 1–2 tiles) or surface waterproofing treatment.
Actionable Remediation & Waterproofing Roadmap
We outline a prioritized remediation plan: stopping the active water source first, allowing substrate drying where required, and applying targeted waterproofing or plumbing repair.
Engineering Technologies Deployed for In-Wall Pipe Leak Detection in Makkah
For in-wall diagnostics, combining infrared thermal imaging, pinless dielectric moisture meters, and contact wall microphones allows us to trace concealed pipe paths and locate leaking elbows within centimeters.
Infrared Thermal Imaging (ΔT Mapping)
Scientific Principle: Infrared cameras measure surface temperature differentials (ΔT) across walls, ceilings, and floors caused by evaporative cooling of moisture or heat transfer from hot water lines—they do not "see water through solid concrete" like X-rays.
- • Tracing concealed hot water supply lines beneath tiles or inside plastered walls
- • Mapping the spatial spread of evaporative dampness across ceilings and walls
- • Identifying moisture-cooled zones prior to pinpointed dielectric moisture readings
- • If leaking water is at thermal equilibrium with the surrounding slab, thermal contrast is minimal unless hot water flow is induced
- • Polished porcelain, marble, or glass surfaces reflect ambient radiation and require careful emissivity interpretation
- • Thermal imaging serves as a spatial mapping tool and must always be confirmed with moisture meters or pressure gauges
Dielectric & Pin Moisture Meters
Scientific Principle: Non-invasive dielectric meters measure changes in the electrical permittivity of building materials (concrete, plaster, gypsum, tile beds) up to 20–40 mm deep to quantify relative moisture saturation against dry baseline zones.
- • Locating the highest moisture concentration point along peeling lower walls and skirting boards
- • Distinguishing historic dried stains from active ongoing leaks in ceilings
- • Checking sub-tile saturation around shower drains, bathtubs, and bathroom thresholds
- • Dense steel rebar or shallow electrical conduits can influence capacitance readings, requiring dry-wall baseline calibration
- • Confirms moisture presence and gradient direction, but must be paired with line isolation to distinguish supply vs. drainage sources
Acoustic Listening & Ground Microphones
Scientific Principle: Ground microphones and contact acoustic sensors amplify specific frequency vibrations generated when pressurized water escapes through a pipe crack or fitting joint, filtering ambient noise to locate the peak decibel point.
- • Pressurized water supply lines beneath ceramic and porcelain floor tiles
- • Buried external supply pipes under courtyard pavers and walkways
- • Pinpointing active leaks in pressurized PPR and metallic pipes inside walls
- • Requires sufficient internal line pressure to generate acoustic turbulence; it cannot detect unpressurized gravity drainage leaks on its own
- • Ambient noise from booster pumps, AC compressors, or street traffic must be isolated during measurement
- • Deep burial or thick insulation layers can attenuate acoustic signals, requiring correlation with pressure testing
Hydrostatic & Pneumatic Line Pressure Testing
Scientific Principle: A specific supply branch (cold, hot, or pool circulation line) is isolated and capped, then pressurized with a calibrated manometer gauge; any pressure decay over the holding period confirms a breach in that exact circuit.
- • Definitively separating pressurized supply pipe failures from drainage or grout seepage in bathrooms and kitchens
- • Verifying the integrity of the main buried line between the water meter and underground tank
- • Independently testing swimming pool skimmer, return, and main drain lines apart from the concrete shell
- • Test pressure must never exceed safe operating limits for aging pipes to avoid stressing intact joints
- • Worn angle valves or mixer cartridges can cause false pressure drops unless outlets are properly plugged during the test
Engineering Visual Inspection, Borescope & Flood Testing
Scientific Principle: Combines systematic inspection of grout joints, drain throats, tank necks, and plumbing shafts with flexible borescope cameras for concealed cavities and controlled flood/dye testing for unpressurized floor drains.
- • Inspecting above suspended gypsum ceilings and inside narrow pipe chases without demolition
- • Testing shower pan grout, floor drain seals, and toilet base connections
- • Examining concrete cracks, honeycombing, and neck joints inside water tanks and pools
- • Borescope cameras require an existing small aperture (e.g., spotlight cutout or access hatch) and cannot penetrate solid mortar
- • Controlled flood testing of wet-area floors requires sufficient observation time to confirm seepage migration
Service Scope: Wall Leak Detection vs. Localized Pipe Repair vs. Wall Waterproofing
In-Wall Pipe Leak Detection: Identifying which concealed system inside the wall is leaking (cold supply, hot supply, AC drain, or soil stack) and marking the exact fault point non-destructively.
Localized Pipe Repair: Opening only a small plaster square (or single wall tile) directly over the pinpointed fitting to weld/repair the pipe and re-test pressure.
Wall Waterproofing: If wall dampness originates from exterior facade rain penetration or failed waterproofing in an adjacent shower wall, we guide you to the proper waterproofing treatment.
What Happens After Pinpointing an In-Wall Pipe Leak?
Finding 1: Leak at an embedded brass adapter or PPR elbow inside the wall
Small localized opening at the exact fitting only.Recommended Action: Open a small localized access window over the fitting, fuse a new joint, test pressure, and re-plaster after masonry drying.
Finding 2: Blocked or leaking concealed split-AC condensate drain line
Typically zero wall breaking for blockages or upper hose disconnects.Recommended Action: Flush and clear the condensate line and secure the indoor pan hose, or repair the pinpointed elbow if cracked.
Finding 3: Accidental drill screw puncture in a concealed wall pipe
Minimal localized pocket around the screw hole only.Recommended Action: Expose only the immediate area around the puncture, repair with a fused PPR coupling/saddle, and pressure-test.
Distinguishing In-Wall Supply Leaks from AC Drains and Rising Damp
The spatial pattern on the wall combined with instrument readings immediately differentiates the source:
| Condition / Fault Type | Physical & Visual Signs | Instrument Reading Pattern | Correct Engineering Fix |
|---|---|---|---|
| Pressurized In-Wall Supply Pipe Leak | Circular or vertical damp patch expanding 24/7 along a plumbing chase. | Manometer pressure drop + clear contact microphone signal + thermal ΔT trace. | Localized opening at the acoustic/thermal peak to repair the pipe. |
| Concealed AC Condensate Line Leak | Dampness tracks diagonally or vertically below an indoor split AC unit and worsens on humid summer days. | Main plumbing pressure holds 100% steady + cold moisture track appears along the AC drain chase during pour testing. | Clear and service the AC condensate drain or repair the cracked elbow. |
| Seepage Through the Back of an Adjacent Shower Wall | Dampness on the reverse side of a shared shower wall between 20 and 120 cm height. | If supply pipes hold pressure, moisture meter shows peak saturation along open wall-tile grout lines inside the shower. | Reseal shower wall tile grout and mixer escutcheons non-destructively. |
In Makkah, concealed wall pipes and vertical shaft risers operate under high hydraulic pressures generated by multi-story booster pumps, making embedded elbows and unions critical failure points.
In multi-story residential and hospitality buildings in Makkah (Al-Aziziyah, Al-Shawqiyah, Batha Quraish, Al-Naseem, Al-Zahir, Al-Shara’i), tall vertical risers run through walls and shafts; a leak on an upper floor often drops through hollow block cores to appear on the wall below.
Hollow concrete and volcanic masonry blocks used in Makkah allow leaking water to cascade vertically inside wall cavities unless the highest origin point is pinpointed.
High pump discharge pressures and water hammer in multi-story Makkah buildings stress concealed wall fusion welds.
Sharp temperature differentials between hot supply lines and air-conditioned interiors in Makkah create thermal expansion stress inside wall render.
Common Property Scenarios We Inspect Across Makkah:
- Multi-Story Buildings in Al-Aziziyah, Al-Shawqiyah & Al-Naseem: Wall dampness spanning between two floors or surrounding a shared plumbing shaft. — Top-down thermal and moisture scanning combined with floor-by-floor pressure isolation to find the highest origin point.
- Villas in Al-Awali, Batha Quraish & Al-Shara’i: Blistering paint on a bedroom wall backing onto a bathroom or kitchen accompanied by hot-water pressure loss. — Hydrostatic testing of hot and cold lines and pinpointing the leaking elbow with contact microphones and thermal imaging.
Makkah Field Scenario: Vertical Riser Pipe Leak Inside a Wall in Al-Aziziyah
Severe dampness appeared on a third-floor living room wall in Al-Aziziyah; a previous plumber broke open the wet patch on the third floor but found the pipe dry at that spot.
Our engineer scanned the wall vertically from the third floor up into the fourth floor using thermal imaging and moisture meters—discovering the leak actually originated at an elbow 40 cm above the fourth-floor slab and trickled down inside hollow block cores.
Only the fourth-floor elbow pocket was opened and repaired, and the third-floor wall dried completely within days.
District Clusters Served for In-Wall Pipe Leak Detection in Makkah:
In-Wall Pipe Leak Inspection Cost Factors in Jeddah & Makkah
Inspection pricing is determined by the following technical parameters:
- Number of damp walls or rooms requiring thermal, moisture, and acoustic scanning.
- Pipe accessibility (interior single-floor wall vs. multi-story shared vertical plumbing shaft).
- Wall finish type (painted plaster, ceramic/porcelain wall tiles, marble cladding, or decorative panels).
- Number of independent circuits requiring isolation (hot/cold supply, AC drains, waste stacks).
Preparing the Wall Area Before the Technician Arrives
Following these simple preparation steps helps our field engineer complete accurate readings faster:
- 1Move freestanding furniture about 1 meter away from the affected wall to allow unobstructed thermal and moisture scanning.
- 2Turn on the water heater 30 minutes before arrival if hot water pipes run through the wall.
- 3Run the wall-mounted split AC unit for 30 minutes prior if an AC condensate drain leak is suspected.
- 4Leave the blistered paint untouched until moisture readings are completed.
What If Diagnostics Confirm Waterproofing Is Needed?
If wall diagnostics prove all internal pipes are intact and dampness stems from exterior rain penetration or an unsealed wet-room wall, we guide you to the right waterproofing solution.
Related Leak Detection Services in Makkah:
Common Questions About In-Wall Pipe Leak Detection in Makkah
Why does wall dampness appear in my Makkah apartment when the pipe leak is actually on the floor above?
Because hollow concrete masonry blocks have interconnected vertical cores; water leaking from a pipe inside an upstairs wall drops by gravity through the block cavities until it hits your ceiling beam or slab and emerges on your wall.
How do you inspect pipe leaks inside tall building plumbing shafts in Makkah?
We sequentially isolate down-feed branches from the roof tank for each apartment while monitoring pressure gauges, combined with visual and thermal shaft inspections to identify the exact leaking riser.
Can you locate a leak behind ceramic or marble wall cladding in Makkah without stripping the whole wall?
Yes. Infrared thermal cameras, contact wall microphones, and pinless dielectric moisture meters read directly through ceramic and marble cladding to pinpoint the exact tile covering the leaking joint.
Why do concealed brass wall adapters frequently leak in Makkah buildings?
Due to the combination of high booster-pump discharge pressures, extreme hot-water thermal expansion, or over-torquing threaded fittings during installation.
Do you inspect dampness on elevator shaft walls and basements in Makkah buildings?
Yes. We trace water emerging on basement walls and elevator pits in Makkah to determine whether it originates from the underground water tank or nearby buried supply/drainage lines.
How can I schedule an in-wall pipe leak inspection in Makkah?
Complete the quick inspection form on this page or reach out via our verified channels to schedule a technician visit in your Makkah neighborhood.
Diagnostic & Engineering Comparison Guides to Help You Decide
Lower Wall Dampness & Peeling Paint Causes: How to Distinguish Plumbing Leaks from Rising Damp
Paint blistering or white crystalline salt deposits 15 to 60 cm above floor skirting boards are never a cosmetic issue solved by repainting—they are physical indicators of active moisture migration that must be traced at the source.
Non-Destructive Water Leak Detection Methods Guide: Engineering Principles, Capabilities & Honest Technical Boundaries
Engineering transparency requires stating a vital truth: no single "magic device" detects every type of water leak at the push of a button. Accurate non-destructive diagnosis relies on combining 5 complementary physical technologies.
AC Condensate & Concealed HVAC Drain Line Leaks in Jeddah & Makkah: How to Diagnose Hidden Wall & Ceiling Moisture Without Breaking
A single air conditioning unit operating in Jeddah’s coastal humidity and Makkah’s intense summer heat generates 15 to 35 liters of condensate water per day. When a concealed UPVC drain elbow cracks inside the blockwork or bio-slime blocks the line, wall blistering and gypsum ceiling stains mimic pressurized plumbing leaks.
In-Wall Pipe Leak Detection in Jeddah
View our dedicated In-Wall Pipe Leak Detection guide tailored to Jeddah properties.
View Jeddah PageAll Leak Detection Services in Makkah:
Submit Your Issue Details to Coordinate an Inspection or Quote
Complete the fields below accurately. Your submission is validated and assigned a unique reference ID, with a ready-to-share technical summary.